Showing posts with label mac. Show all posts

Thursday, 2 August 2012

Face Contouring


Hiya!

Today I wanted to show a little bit of face contouring. I'm going to be using alot of product to show the full effects on camera, it looks great for a night out face, but for daytime just tone it down and use less!

Most people know what face contouring is, for those who don't, its a way of using makeup to slim, define or accentuate areas of the face, and highlight other areas to give your face more dimension

To put it simply, think of the areas of your face that light will naturally hit, those should be highlighted, areas that light wouldn't naturally shine on, should be contoured.

face contouring

Here's a very attractive picture of me trying to show you the basics, I look so serious! Haha x


So, I'll show you guys a little contouring using a nice and cheap kit, then mabye later we'll advance it and get more professional and complex! Exciting!


face contouring
face contouring
I'm using good old Sleek Makeup with their face contour kit, costing £6.49 its pretty cheap, lasts ages, and it comes in Light, Medium and Dark so theres one for most skin types.

If you wanna use things you already have lying about,  highlighters examples are Mac in Shell or Benefit HighBeam - anything like that

For the contouring, you need a powder a few shades darker than your skin, making sure it is a matte (no shine) - Benefit Hoola Powder works great!

For actual brushes, I'm keeping this really simple, using a basic blusher brush, eyeshadow blending brush and shader brushes, as I always say, whatever works for you!

So, let's begin!

To start off, apply your usual foundation, concealer, whatever you do to create your "base"
face contouring
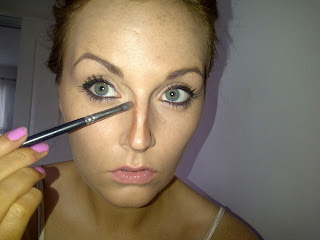
 I'm starting off with my nose, using a shader brush, I applied lightly down both sides of my nose, and the tip slightly

face contouring
When your blending it in, always blend in the same direction you applied it, so it doesn't spread the colour everywhere you dont want it to be!

face contouring
For the cheeks, your wanting to contour below the hollow of your cheekbone, if it helps, hold a brush to your face, lining it up with the top of your ear to your lips, then apply underneath, this also helps you get it even on both sides of your face

face contouring


Follow up to your temples, and slightly along your forehead

face contouring
Don't forget a little bit on your jawline, and remember your neck too!  Sometimes its nice to apply to your collarbones too, just to make them stand out a little more

face contouring
I cant say this enough - BLEND BLEND BLEND! I used an old foundation brush to really buff into my skin, you don't want ANY harsh lines on your face

face contouring
I just used my fingers to apply the powder highlighter.....
face contouring
And if your using a liquid highlighter, just dab slightly with your middle finger, have a peak at the picture at the top for basic highlight areas.

Obviously, you'll know your own face, some people have lovely dewy skin and wont require much highlight, others might want a more dramatic look for a photo shoot or nighttime look, I've used alot to show up better in pictures for you guys, time for some befores and afters!

face contouring
face contouring
face contouring
This was taken in natural light....
face contouring


See how slimmer the nose looks, and the cheekbones look more prominent

Remember to think about your lighting when your contouring, in a dimly lit room you could go overboard!

face contouring
Sorry Nicki if thats the look you wanted, but not my idea of contouring!


What do you think?  Dramatic yes, but you could also do it really subtle, just a touch would look fab!
The sleek kit isn't bad, a little hard to blend, but for the price, you cant complain!  Practise makes perfect with contouring, keep experimenting - I'm still learning, but that's my attempts so far!

Let me know if you try it out!

Gem x

face contouring


Tuesday, 26 June 2012

Inspired by Kristen Stewart - Smokey Eyes

Hiya Everyone

Ok I admit it - I am a Twihard.

I adore the Twilight books, and I enjoy the films, but you don't have to be a fan to admire Kristen Stewart.  

I think she's beautiful, she has her own unique style, she doesn't care about following others, she's her own person (and I love the fact she wears her Converse to film premiers!)

Her make-up is always fantastic, very smokey and smudgy, so I thought I would do my version of her makeup inspired by her look at the 2009 MTV Movie Awards

kristen stewart makeup

It's such a beautiful look, so here's what I used for my version:

kristen stewart inspired smokey eye makeup
  • Urban Decay NAKED palate in NAKED,BUCK and CREEP
  • MAC Tartan Tale Dashing Lassie Eye Shadows in A DASHING LASSIE and MAGICAL MIST
  • MAC Eyeshadow in BRONZE
  • MAC Zoom Fast Mascara in BLACK
  • RIMMEL Waterproof Gel Eyeliner in BLACK 
  • RIMMEL Soft Kohl Eyeliner Pencil in STORMY GREY
  • Eylure Katy Perry Eyelashes in Oh Honey!
  • Duo Eyelash Adhesive Glue
kristen stewart inspired smokey eye makeup
  • MAC 219 Pencil Brush
  • MAC 231 Small Shader Brush
  • MAC 224 Tapered Blending Brush
  • MAC 275 Medium Angled Shading Brush
Note: I'm aware the Dashing Lassie palate was Limited Edition, however, any silver grey and white shades will do :)

Lets begin!

Step One

kristen stewart inspired smokey eye makeup

 Using a 275 brush I applied the NAKED shade all over my eye for a nice base colour

Step Two

kristen stewart inspired smokey eye makeup

Using the 219 brush, I mixed the white and grey shades and applied in the middle of my eyelid

Step Three

kristen stewart inspired smokey eye makeup

Using the 219 brush I applied CREEP in the outer corner of my eye, blending to mix with the other shades slightly

Step Four

kristen stewart inspired smokey eye makeup

Apply BUCK in the inner corner of your eye with the 231 brush, and across the crease of your eyelid, apply a little more in the outer corner and spread outwards slightly.  Don't worry about it being messy, as you'll be blending it all in

Step Five

kristen stewart inspired smokey eye makeup

Blend Blend Blend!


Step Six
kristen stewart inspired smokey eye makeup

 Use the gel eyeliner and fill in over the CREEP shade, to add more depth, then use your 231 shader brush to smudge the eyeliner and blend it more
Step Seven
kristen stewart inspired smokey eye makeup


Using the gel eyeliner, apply a very very thin line from the inner corner, right to your outer corner

Step Eight

kristen stewart inspired smokey eye makeup

Apply your grey eyeliner to the waterline of your eye

Step Nine

kristen stewart inspired smokey eye makeup
Use the flat side of a 231 brush and apply BUCK under your eyelid, and join with your outer corner

Step Ten

kristen stewart inspired smokey eye makeup
This look doesn't have really mega full lashes, but I couldn't find any half lash sets that I liked, so I've used Katy Perry Eyelashes and cut them about 3/4 the way across, I used my eyelash applicator and Duo glue 

Step Eleven

kristen stewart inspired smokey eye makeup
 I used MAC Zoom Mascara to blend the false eyelashes into my own, then used my shader brush to apply the bronze eyeshadow over the BUCK colour.

Blend everything together, and here's the final result:

kristen stewart inspired smokey eye makeup
 kristen stewart inspired smokey eye makeup
Kristen's Makeup/My Makeup

kristen stewart inspired smokey eye makeup

Hope you guys like the look, its very smouldering, and would go with most eye colours :) Obviously this is just my version of the look, but I like how it turned out

Thanks to everyone has has voted for me, subscribed to me, and commented on my posts, LipglossandCandyFloss has really taken off, and I appreciate the support so much x

Hope you guys try this look out!

Gem x


PS. Non Twilight fans look away now.......
kristen stewart inspired smokey eye makeup


Haha xxxx

Sunday, 17 June 2012

Eye Bling - Gold

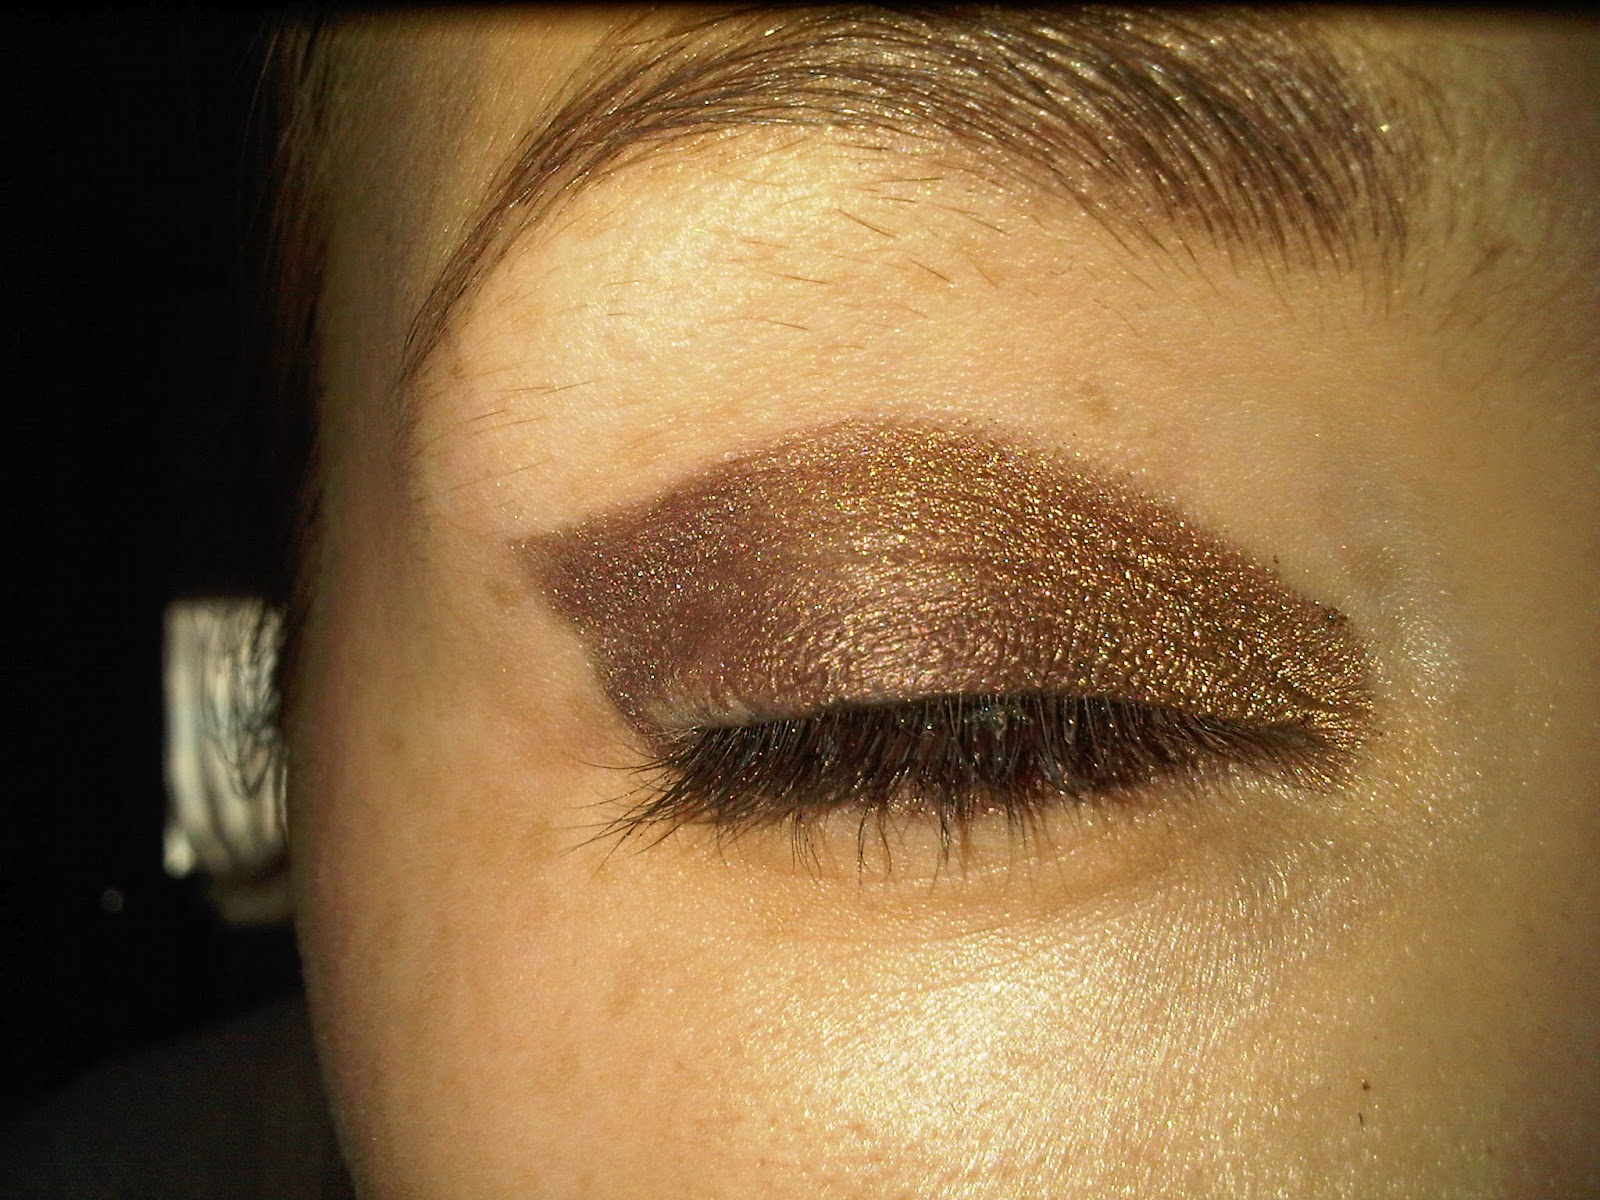
gold eye bling


Hiya!


I thought this was a awesome look for night time: gold eye bling with some browns and bronze!

If you like, read on...

What I used:
makeup used for old eye bling
  •  The good old Urban Decay NAKED palette in SMOG and DARKHORSE
  • MAC Paint Pot in CONSTRUCTIVIST
  • Barry M Glitter Liquid Eyeliner in 11 GOLD
  • Rimmel Gel Pot Liner in BLACKEST BLACK
  • Soap and Glory Smoulder Kohl  Eyeliner in COCOA BEAN
  • MAC Zoom Lash Mascara in BLACK
brushes used for eye bling gold

  • Eye Rock Glimmer Topaz Crystal Tattoos
  • Urban Decay Brush (within the NAKED palette)
  • MAC 231 Small Shader Brush
  • MAC 219se Pencil Brush
  • MAC 224 Tapered Blending Brush 

Remember: Use any colours/brushes you have, this is just an example :)

Got all that?  Lets begin...

Step One
mac brown eyeshadow
Apply your paintpot with the small shader brush over your whole eyelid and under your eye, making a small flick at the end

Step Two
urban decay eyeshadow
Use the shade HALF BAKED with your Urban Decay brush and apply to the inner corner of your eyes, and blend to about 1/2 across the eyelid

Step Three
 blending brush for dark eyeshadow
Apply from DARKHORSE in the outer corner and use the blending brush to blend over your eyelid
Step Four
gel eyeliner
Apply the gel eyeliner across your eyelid, following the natural shape of your eye

Step Five
kohl eyeliner
Apply your kohl eyeliner along your waterline, smudging slightly under your eye

Step Six
eye bling
Cut the eye bling to shape, peel off the backing paper and place carefully on your eyelid, hold down for a few seconds to warm up the adhesive, and slowly peel back.
Use the Barry M gold eyeliner and line just above the black eyeliner, and under the outer corner of your eye. I used the shader brush to sweep over the rest of the bling, to blend it all together
Add lashings of mascara ( or falsies) and.......
Taa-Daa!

gold eye bling
gold eye bling finished look


What you guys think?  I just threw those colours together but you could be creative with it!
Please comment/subscribe if you enjoyed :)
Make your eyes pop!

Gem xxx