Showing posts with label nail art. Show all posts

Monday, 25 June 2012

Gradient Sparkle Nails


Hello everyone :)

I wanted to do a little post about my new nail crush - gradient nails

They're really easy to do, so read on!

What I used:
 nail polish for gradient nails


  • MaxFactor Mini Nail Polish in Cool Jade
  • Max Factor Mini Nail Polish in Juicy Plum
  • GOSH Nail Polish in Bubblegum Pink
  • Nina Ultra Pro - Wet Glaze
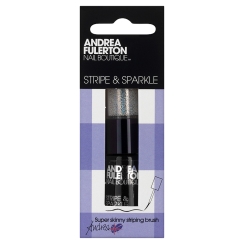
  • Andrea Fulerton Stripe and Sparkle 
  • A sponge, I used an old kitchen one and cut into a square shape :)

So, first off, decide what colours you'd like, what would go together, etc. This is just a quick example I put together with what I had, and I thought pastel colours would be pretty, but I'm sure you guys will be much more creative :)

 I cut the sponge, and applied the nail polish in 3 stripes, making sure that they overlapped slightly, as this gives the gradient effect

On a clean, dry nail, apply the sponge, holding down firmly and slowly moving it from side to side

gradient nails

Obviously you can re-apply more nail polish if the sponge has dried out.  I applied a few coats to my nails, because each time you apply, your blending it more to give a better effect.

While my nails were still wet, I sprinkled some of the glitter over them (careful - it gets messy! I applied it over a sink) and then applied my clear polish to my nails.

Finally, grab a cotton bud and some nail varnish remover to take away excess polish the sponge left on your skin

That's it! It's really easy yet I think it looks great
graient nails

gradient nails
That was my first ever attempt at gradient nails, so I'm pleased with the result, I think next time I'll buy some better sponges to make it blend better and overlap the polish more, but overall, it's really pretty :)

Hope you enjoyed that quick post, I've got some exciting makeup looks I'm adding this week, so check back soon, it's going to be awesome!

Gem
xxx

Sunday, 10 June 2012

Leopard Print Nails - Rawrrr!

Show off your wild side with leopard nails! They're so easy and quick to do, but look so professional!

leopard print nails cat ring
The great thing about this design is you can use any colours you want! Be creative! For this tutorial, I used:
leopard print nails nail polish close up
  • Barry M Instant Nail Effects 320 Foil
  • Barry M Nail Paint 136 Tangerine
  • Barry M "All in one" Basecoat, Topcoat & Nail Hardener Nail Paint NP54
  • Kiss Nail Art Paint in Black 

Before you start, make sure you have some scrap paper to wipe any excess nail varnish, and, if you like, find a leopard print pattern to use as a reference
Step One
Always apply a basecoat before using colour, to protect your nails and to give a smoother finish

Step Two
Apply your gold colour

gold foil nail polish

Step Three
Use your nail art brush to make "c" shapes on your nails in different directions, don't worry if some lines are thicker or thinner than others, that's what gives it the effect we're after!

leopard print picture for reference
leopard print nail

Step Four
Making sure your nails are dry, take a thin nail brush (or clean the one you just used),and dip into your orange colour and carefully fill in around the "c" shapes
hand close up


Step Five
Apply a topcoat to protect from chipping and voila! Leopard print nails!
Practise makes perfect with this technique, practise on some paper first if you like!
final result leopard print nails
Hope you guys enjoyed! Let me know if you give it a go!  Rawwwrrrr!

Gem x

Thursday, 7 June 2012

Nail Bling!


So I went to good old Salon Services the other day, and came across these gorgeous nail art stickers:

packets of nail bling

This is only five of the eleven styles that are available, there all so unusual, a bit more exciting than your normal nail stickers.

I opted for Silver Gem ( very appropiate! ) to test these out:

silver

Silver Gem also comes in a packet for toes, but after checking the website, they are the only ones that do, which I found quite strange.
bubblegum pink nails
 I first painted my nails in GOSH Bubblegum Pink before I added the bling, just to add a pop of colour. They are just like your regular nail stickers, all you do is line them up, stick them on, and file off any excess - really quick to do.

nail bling close up shot

This was the end result, they didnt look too bad, I did mine in a bit of a hurry, but if you took your time doing it they'd look really fantastic.  They retail on sallyexpress.com for £7.49, but they're doing a deal of £4.99 until 4/7/12, which is pretty good.  Silver Gem was a nice design, but I think next time I'll go bolder with something more eye catching like Black Jewels =)

Hope you guys enjoyed, please comment and subscribe, I'm going to be posting a lot so it would be great to have some regulars! Haha

Gem x