Showing posts with label nails. Show all posts

Thursday, 9 August 2012

imPRESS Press-On Manicure


Hiya!

I wanted to show some great nails: imPress Press-On Manicure by Broadway

What are they? Basically there false nails, but the difference is these babies require NO glue! NO drying time! Fast and Easy! Hoorah!

They come in a massive range of block colours and designs, there is something everyone will love

imPress press-on manicure in Ecstatic Cling

To show you guys, I bought the beautiful shade Ecstatic Cling which is a neon pink


imPress press-on manicure in Ecstatic Cling


imPress press-on manicure in Ecstatic Cling
The packaging is great, its like a little nail polish bottle and it's perfect for travelling about with
The packet has 24 covers with 12 nail sizes

First thing to do before you apply is to lay all the sizes out to find your correct fit

The nails have a little clear tab which you align with your cuticle to see what nail best fits, check both sides and when your happy, lay all ten out in finger order, always apply your thumbs last

To apply its so simple, make sure you have no polish left on your nails,and in the box you'll find a little prep pad, which you wipe over your nails to ensure there is no residue or moisture on your nails so the manicure will last longer

Starting with your little finger, peel off the clear film and press onto the nail firmly down the centre, then smooth it

imPress press-on manicure in Ecstatic Cling

And that's it!

Don't get your hands wet for 30 minutes after application as this could effect it bonding with your natural nail

imPress press-on manicure in Ecstatic Cling

imPress press-on manicure in Ecstatic Cling


The nails are designed to last for about one week, which mine did indeed do

They didn't even feel like they were loose or were going to ping off, the length is great, not too long, I was still able to type on my laptop and do buttons! Haha 

To remove, all you do is apply some nail varnish remover to the nail for 30 seconds, and gently peel off, I found it pretty easy and my nails don't appear to be damaged

imPress press-on manicure in Ecstatic Cling


Final thoughts on imPRESS manicure:

Pros:
  • Great packaging
  • Quick and easy with no glue
  • Easy to travel with, easy to apply, you could do them on a bus train, anywhere!
  • They're so shiny and glossy, like a professional manicure, I had so many compliments
  • 36 different shades so plenty of choice
  • They kept their promise they would last 7 days

Cons:
  • The size range of nails wasn't great, if you have wide nails you might struggle to get a good fit
  • My hair kept catching alot on the nails
The nails sell for £7.99 from Boots, which is I think is quite reasonable for a pack of 24, I think Superdrug now sell them for £5.99!


Hope you guys enjoyed that, let me know if you buy them!

Gem x

imPress press-on manicure in Ecstatic Cling

Monday, 25 June 2012

Gradient Sparkle Nails


Hello everyone :)

I wanted to do a little post about my new nail crush - gradient nails

They're really easy to do, so read on!

What I used:
 nail polish for gradient nails


  • MaxFactor Mini Nail Polish in Cool Jade
  • Max Factor Mini Nail Polish in Juicy Plum
  • GOSH Nail Polish in Bubblegum Pink
  • Nina Ultra Pro - Wet Glaze
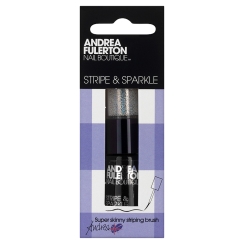
  • Andrea Fulerton Stripe and Sparkle 
  • A sponge, I used an old kitchen one and cut into a square shape :)

So, first off, decide what colours you'd like, what would go together, etc. This is just a quick example I put together with what I had, and I thought pastel colours would be pretty, but I'm sure you guys will be much more creative :)

 I cut the sponge, and applied the nail polish in 3 stripes, making sure that they overlapped slightly, as this gives the gradient effect

On a clean, dry nail, apply the sponge, holding down firmly and slowly moving it from side to side

gradient nails

Obviously you can re-apply more nail polish if the sponge has dried out.  I applied a few coats to my nails, because each time you apply, your blending it more to give a better effect.

While my nails were still wet, I sprinkled some of the glitter over them (careful - it gets messy! I applied it over a sink) and then applied my clear polish to my nails.

Finally, grab a cotton bud and some nail varnish remover to take away excess polish the sponge left on your skin

That's it! It's really easy yet I think it looks great
graient nails

gradient nails
That was my first ever attempt at gradient nails, so I'm pleased with the result, I think next time I'll buy some better sponges to make it blend better and overlap the polish more, but overall, it's really pretty :)

Hope you enjoyed that quick post, I've got some exciting makeup looks I'm adding this week, so check back soon, it's going to be awesome!

Gem
xxx